I only have three students in my class but ,for me, that's an ideal number. I'm not in it for the money but for the sheer joy of sharing my love of sewing.
I started in September with these same ladies . I wasn't sure how to go about teaching sewing so I just winged it. Everyone worked on a project of their choice and I taught about choosing patterns and fabric, I took their measurements and I altered their patterns for them. I covered such basics as using 5/8 " seam allowances, etc. This session lasted about three months until winter put a stop to it.
This time around, the teacher in me took over and I decided that the classes should have a little structure so I decided I would start each night with a simple pattern alteration lesson. Each of the ladies need a Full Bust Adjustment on their bodice patterns , so that's why I started with the two previous and this week's topic. Now, each lady can do her own alteration.
I also do a demonstration of a specific technique such as the Hong Kong finish ,which I did because of a request by Dorothy, Stitch in the Ditch, and setting in a sleeve. Next week I'll demonstrate inserting a zipper. I also review things learned in the fall as the need arises. This all takes about a half hour and then everyone gets busy.
Full Bust Adjustment on Princess Seamed Garments (Simplified Version )
Step 1...Draw a line across both pieces of the bodice about half way between the two notches on each piece.

Step 2... On the front side bodice piece. cut along the line to but not through the side and spread open 1/2" for each cup size above a B cup. Using a French Curve, join the line where it was spread apart .

Step 3... On the center front bodice piece, cut along the line and through each side. Spread apart the same amount that was spread for the side front . True each side edge.
.
You didn't increase the pattern at the side seam so it is still the same length as the back side seam.

Your pattern will now fit nicely over the bust area.

Note: This method works for me as well as my students. It may not provide enough room over the bust if you are very large in that area. You would need to do the slash and spread method. Please let me know if you would like me to show how to do that.
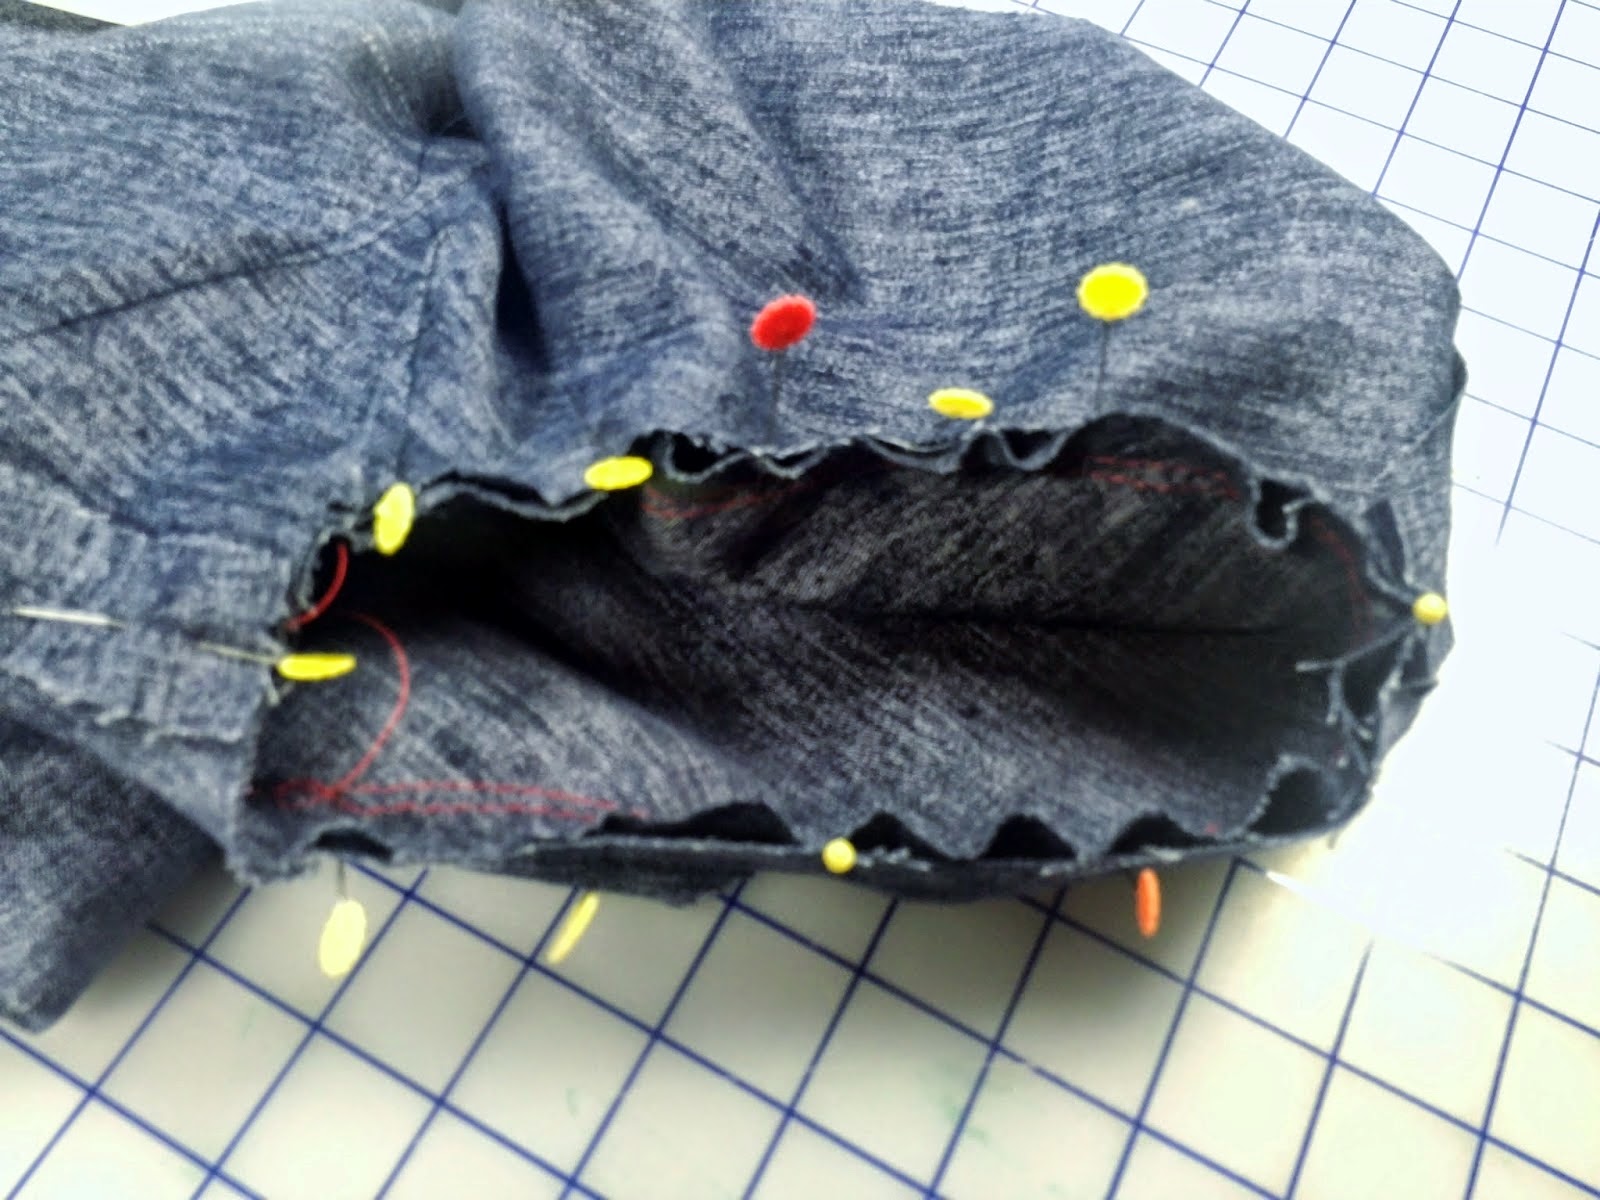
Demonstration... Setting in a Sleeve ( so sorry about the quality of these photos!!!)
1. Sew two rows of basting stitches from just before and just after the front and back notches on the sleeve cap.using the largest stitch length on your sewing machine Sew the first one at 5/8 " from the edge and the second row about 1/8" on the inside of the first one.

2. Sew the sides of the sleeve together. Draw up both rows of the basting stitches
and distribute the fullness evenly along the cap of the sleeve between the notches and beyond if necessary.. Be careful that there are no lumps and that it is as smooth as possible.

3...Pin the sleeve matching the shoulder at the dot and at the under arm seam. These are the two most important places and you must match these two points.


Your sleeve will look like this. I know it looks puckered but it will be OK.
5. Sew with the sleeve side up and be careful to sew exactly at 5/8". ( Bad pic! ) I start sewing at one of the notches.


7... Trim the seam between the notches to about 1 4``. You don`t trim the rest of the sleeve seam.
Press the sleeve lightly toward the sleeve

Check back in next week when I`ll be showing how to narrow a shoulder and demonstrating inserting a zipper.

This is a great tutorial! I have always wanted to be able to sew. My mom was no good so she wasn't able to teach me. Ever since I had my little girl I have wanted to try it again so I can make her cute little things.
ReplyDeleteAlena | http://www.jmsewvac.com/ClassDescriptionsPhotos.html
Alena, there is so much info on line, on You Tube, at Craftsy.com and on blogs that you should just go for it. Please let me know if I can help.
DeleteAwesome tutorial. Thanks for sharing.
ReplyDeleteThank you so much Sheila.
Deletethanks so much for sharing these tutorials! I only wish I lived near you, so I could be one of your students!
ReplyDeleteAw Thank you! I think there is a real need for Sewing teachers as interest seems to be rising if Sewing Blogs are any indication.
DeleteHi Diana. Looking at the bust adjustment tutorial (excellent and not scary!) but I don't think it'll fix my problem. I'm 'front loaded' across the bust so I end up with too much fabric across the back. I buy nearest bust size and add to hips as I'm two sizes bigger round hips but end with with flappy fabric across my back - I must be quite hollow backed?
ReplyDeleteI always enjoy you informative posts. I only wished I lived closer to your sewing school!
ReplyDelete